Building a mind-controlled drone
All of the code that will be discussed in this post can be found in my GitHub repo github.com/jongear/mindcraft
A little over a year ago I stumbled across a demo by Alex Castillo showcasing how you can control a retail drone with your mind. To say I was inspired is an understatement. I immediately DMed Alex and asked him what hardward he leveraged for his demo. Alex graciously shared his hardware recommendations along with a few pointers.
Mind-controlling a Drone with JavaScript is eaiser than it sounds. pic.twitter.com/8XxXgxla5m
— Alex Castillo (@castillo__io) April 17, 2018
A Manual Override
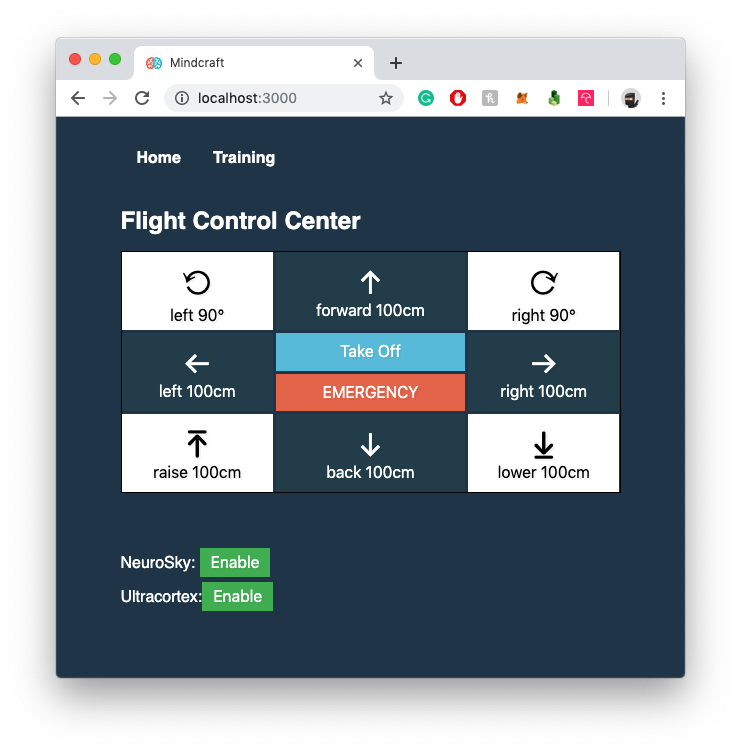
Before I started working on the "mind-control" portion of this project. I recognized early on that I will want to have some form of failsafe in case my maiden flight goes sideways causing my drone to drift towards my living room tv. Out of that need the Mindcraft Flight Control Center was born. Complete with basic steering as well as a Take Off/Landing feature and an Emergency panic button for good measure.
NeuroSky Mindwave Demo
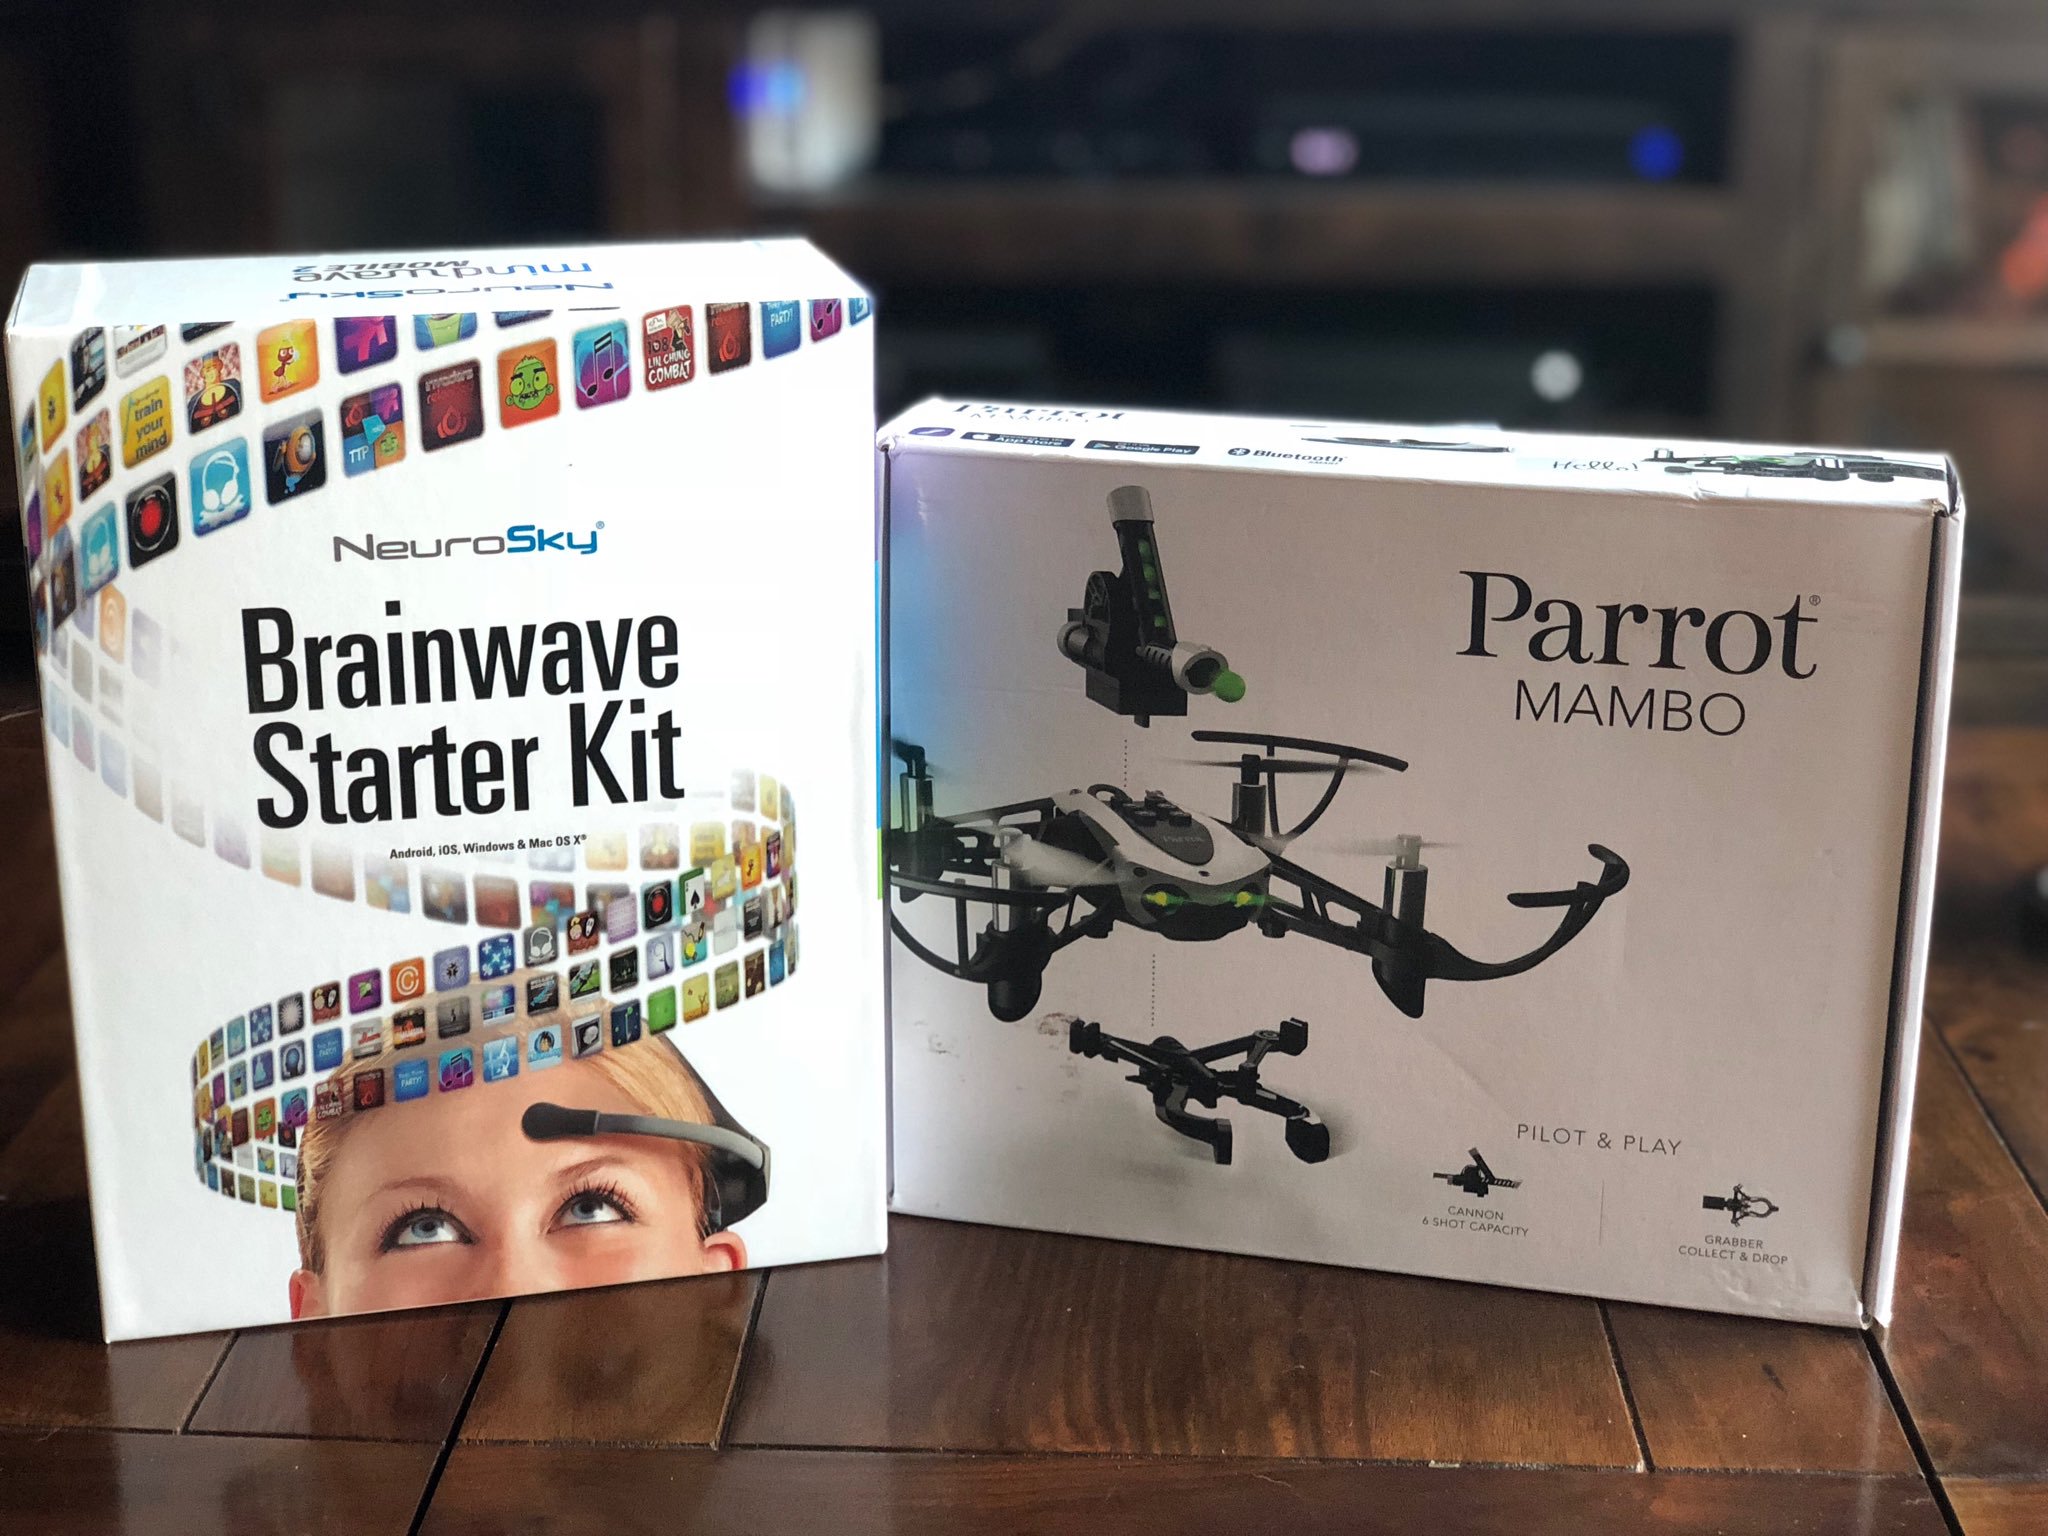
Based off Alex's recommendations I purchased a NeuroSky headset and a similar Parrot Mambo minidrone to the one he used. Click here for my exact shopping list. Total investment is roughly $200 for both products. After a week I was able to hack together a demo that allowed for liftoff and some very rudimentary steering control.
I built a mind control setup for my drone! 🤓 👾 pic.twitter.com/D1HI8d86dW
— Jon Gear (@JonGearDev) July 20, 2018
Cool right? So what is actually going on here? To understand that, we need to dive a little deeper into what the MindWave headset's capabilities are.
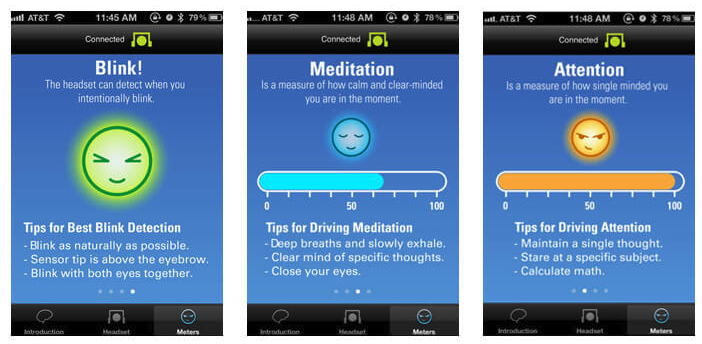
NeuroSky Mindwave headsets are a single channel EEG headset. Which means they have a single contact point to take EEG measurements with. Which is ideal for measuring large EEG artifacts such as a blink as well as measuring meditation and attention. In my demo, I mentioned that I use a hard blink to control takeoff and landing.
this.client = thinkgear.createClient();this.client.on('blink_data', function(data) {console.log(data);if (data.blinkStrength > 200) {if (droneFlying) {drone.land().then(function() {droneFlying = false;log('did land!');});} else {drone.takeoff().then(function() {droneFlying = true;log('did take off!');});}}});
By using the blink readings we now have the ability to decide when to start our flight and when to end it. I purposefully picked blinks as my takeoff option as it's a more natural starting point. It also allows people to try the demo without fear of accidentally sending the drone into flight.
Next up is our flight mechanic. This is a tricky one. Our headset offers two algorithms for predicting intent in meditation and attention. For a while I tried to get both working to allow for a 4-directional flight off of 2 axes but I ended up going back to a single axis flight model due to how difficult it is to try and flip between meditation and attention with any level of control.
For my demo, I chose to isolate the Meditation metric since I'm naturally better at controlling this metric than the Attention one but the code for either is interchangeable
this.client = thinkgear.createClient();this.client.on('data', function(data) {log(data);const meditation = data.eSense.meditation;if (meditation > 50) {log(`meditation: ${meditation}`);if (meditation < 75) {drone.turn({ direction: 'right', speed: 80, steps: 10 }).then(function() {log('moved right!');});} else {drone.turn({ direction: 'left', speed: 80, steps: 10 }).then(function() {log('moved left!');});}}const attention = data.eSense.attention;if (attention > 50) {log(`attention: ${attention}`);}});
For the purposes of the demo, I decided that any reading below 50% since more than likely this is a strong tell that our pilot isn't actively trying to control the drone. Above 50% we have a two-directional steering system. If our pilot meditates from 50-75% the drone will turn right. And 75-100% will cause the drone to turn left.
Ok perfect, so now we can take off, land and turn our drone right or left. But what if we want to go forward and backward as well as pilot our craft in a more controlled way? Well, that's where our Mindwave Headset reaches the end of its capabilities. To accomplish this, we are going to need a headset with more firepower.
OpenBCI Ultracortex Demo
Moving forward we have a two-pronged problem. First we need a device with more contact points and second, we need a new method to steer our drone. Adding more points of contact will not make a difference if we are still relying on our Meditation approach. But first, let's talk about the device that will help us achieve our goal. As you might expect, multiple-channel EEG headsets can span a rather large price point. Ranging anywhere from $600-$20,000 so it is important to make sure you find a device that fits your needs as well as is cost-effective. For this decision, I decided to go with OpenBCI's Ultracortex with the Cyton Daisy Board. Click here for my exact shopping list.

This is where I feel OpenBCI really shines. OpenBCI offers a unique headset called the Ultracortex Mark IV that can be 3D printed and can support up to 16 channels of EEG from up to 35 different 10-20 system locations. This is the real power of OpenBCI's offering. Not only do you have a large number of channels to work with, but you also have the freedom to use them in any configuration that is most impactful for the work you are attempting to accomplish. The icing on the cake is that the 35 different locations follow the 10-20 system which is an international system used by Neurologists, Research Scientists and EEG Hackers alike to commonly annotate where along the subject's head each electrode should be placed to reproduce an experiment.
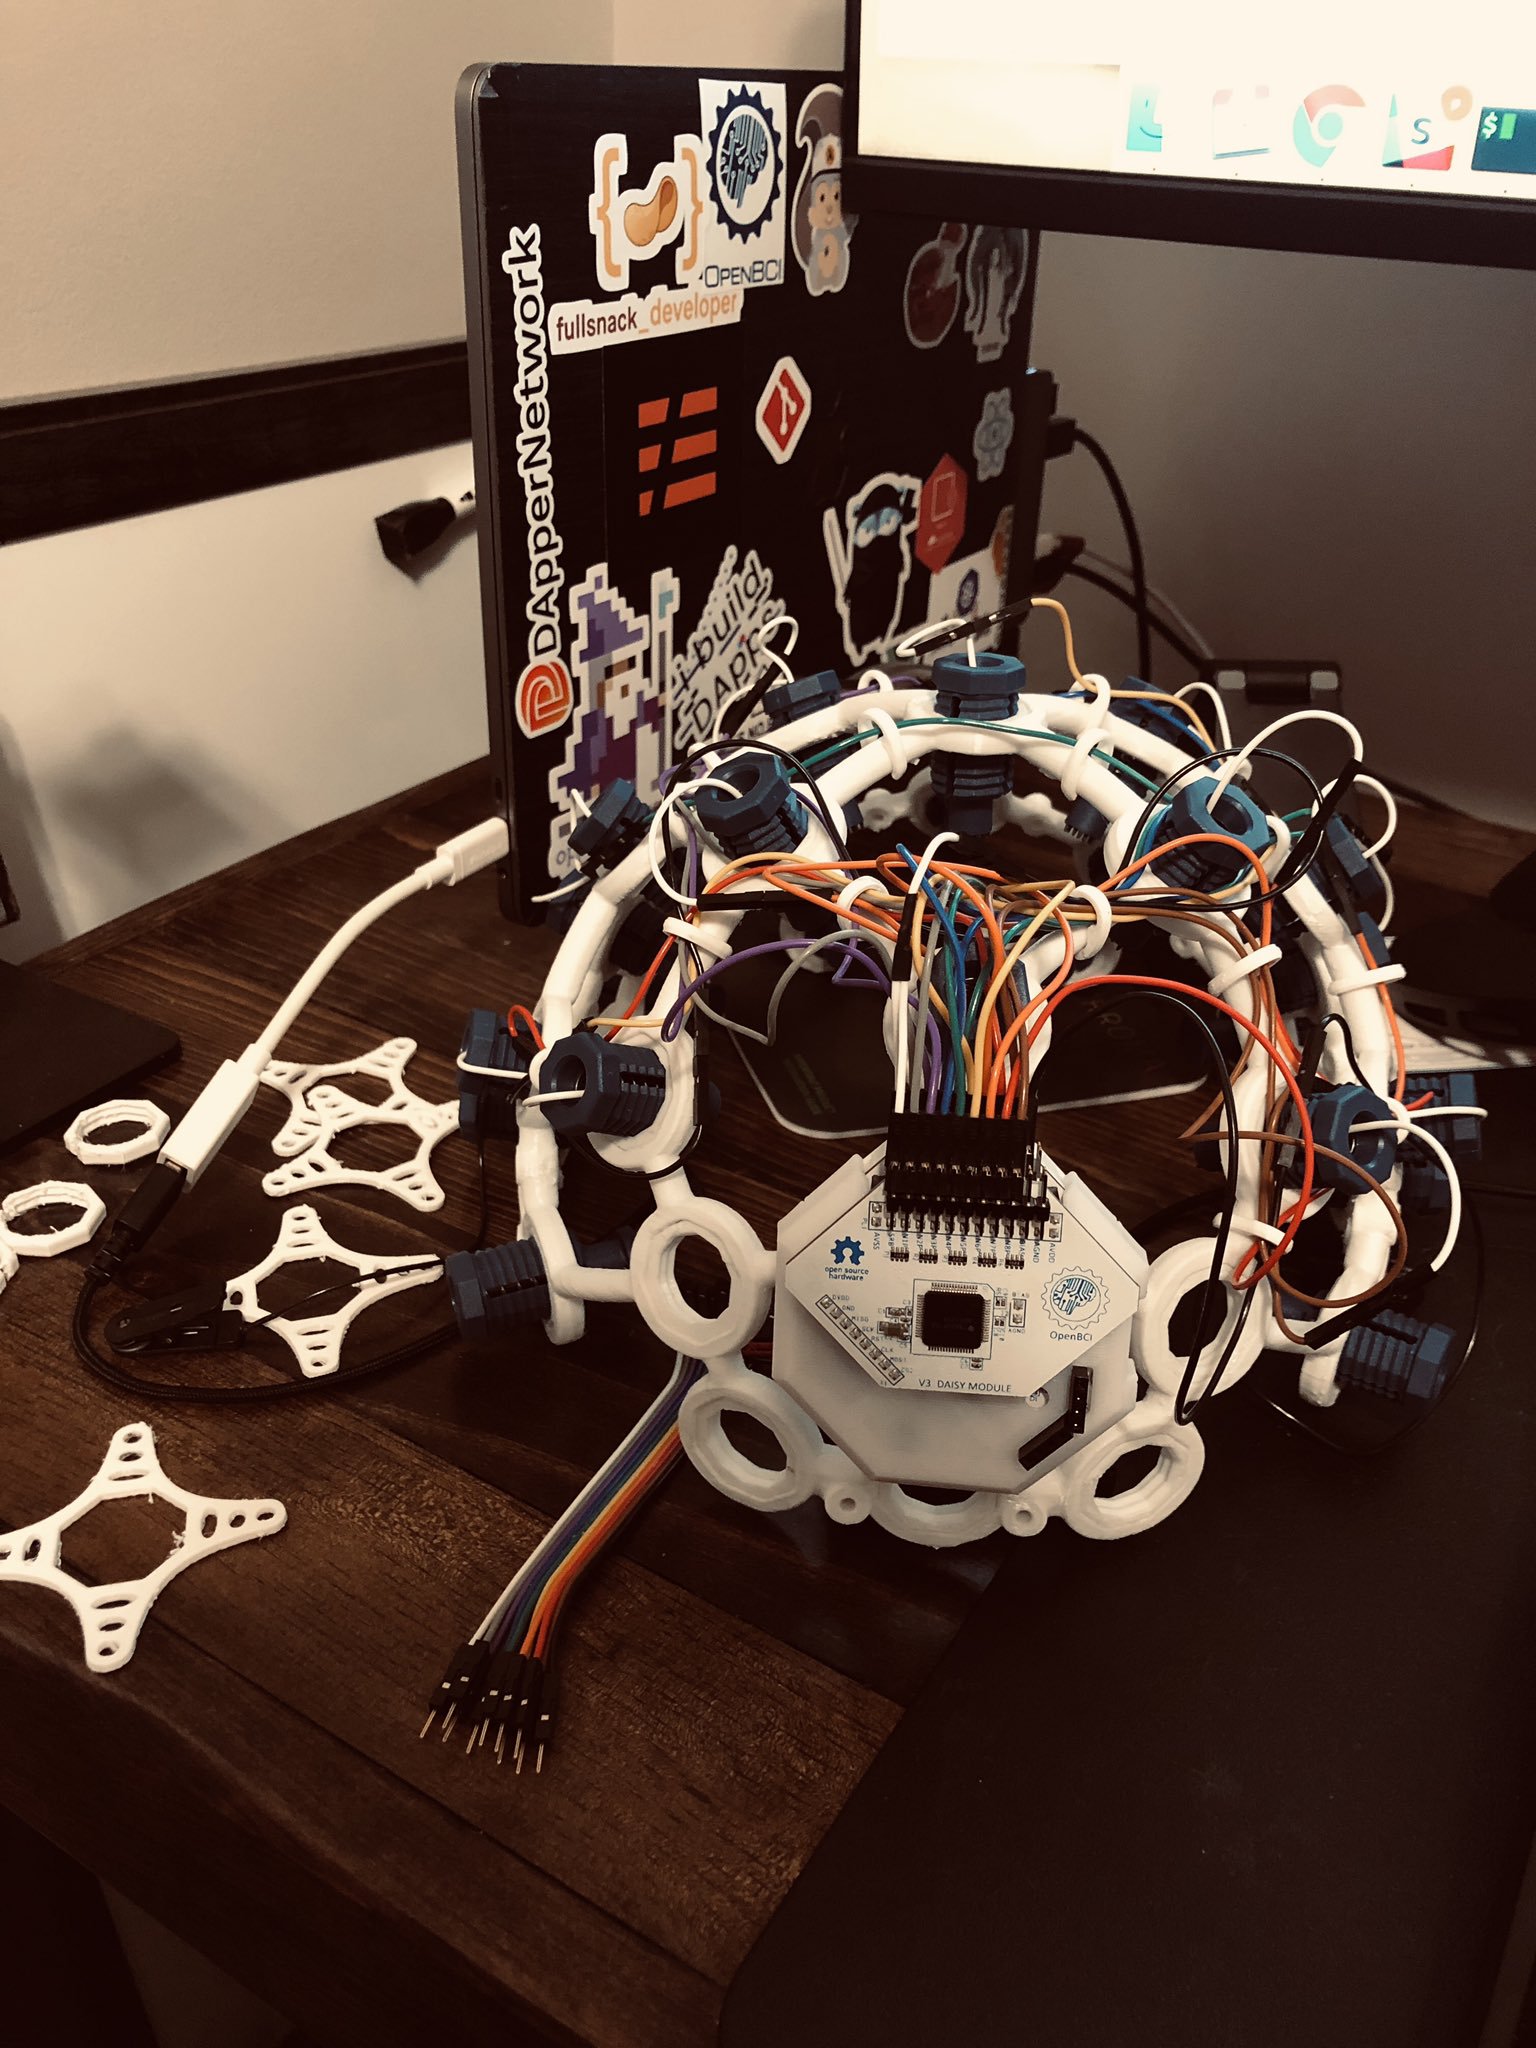
Finished with the first 8 electrode mounts and wiring
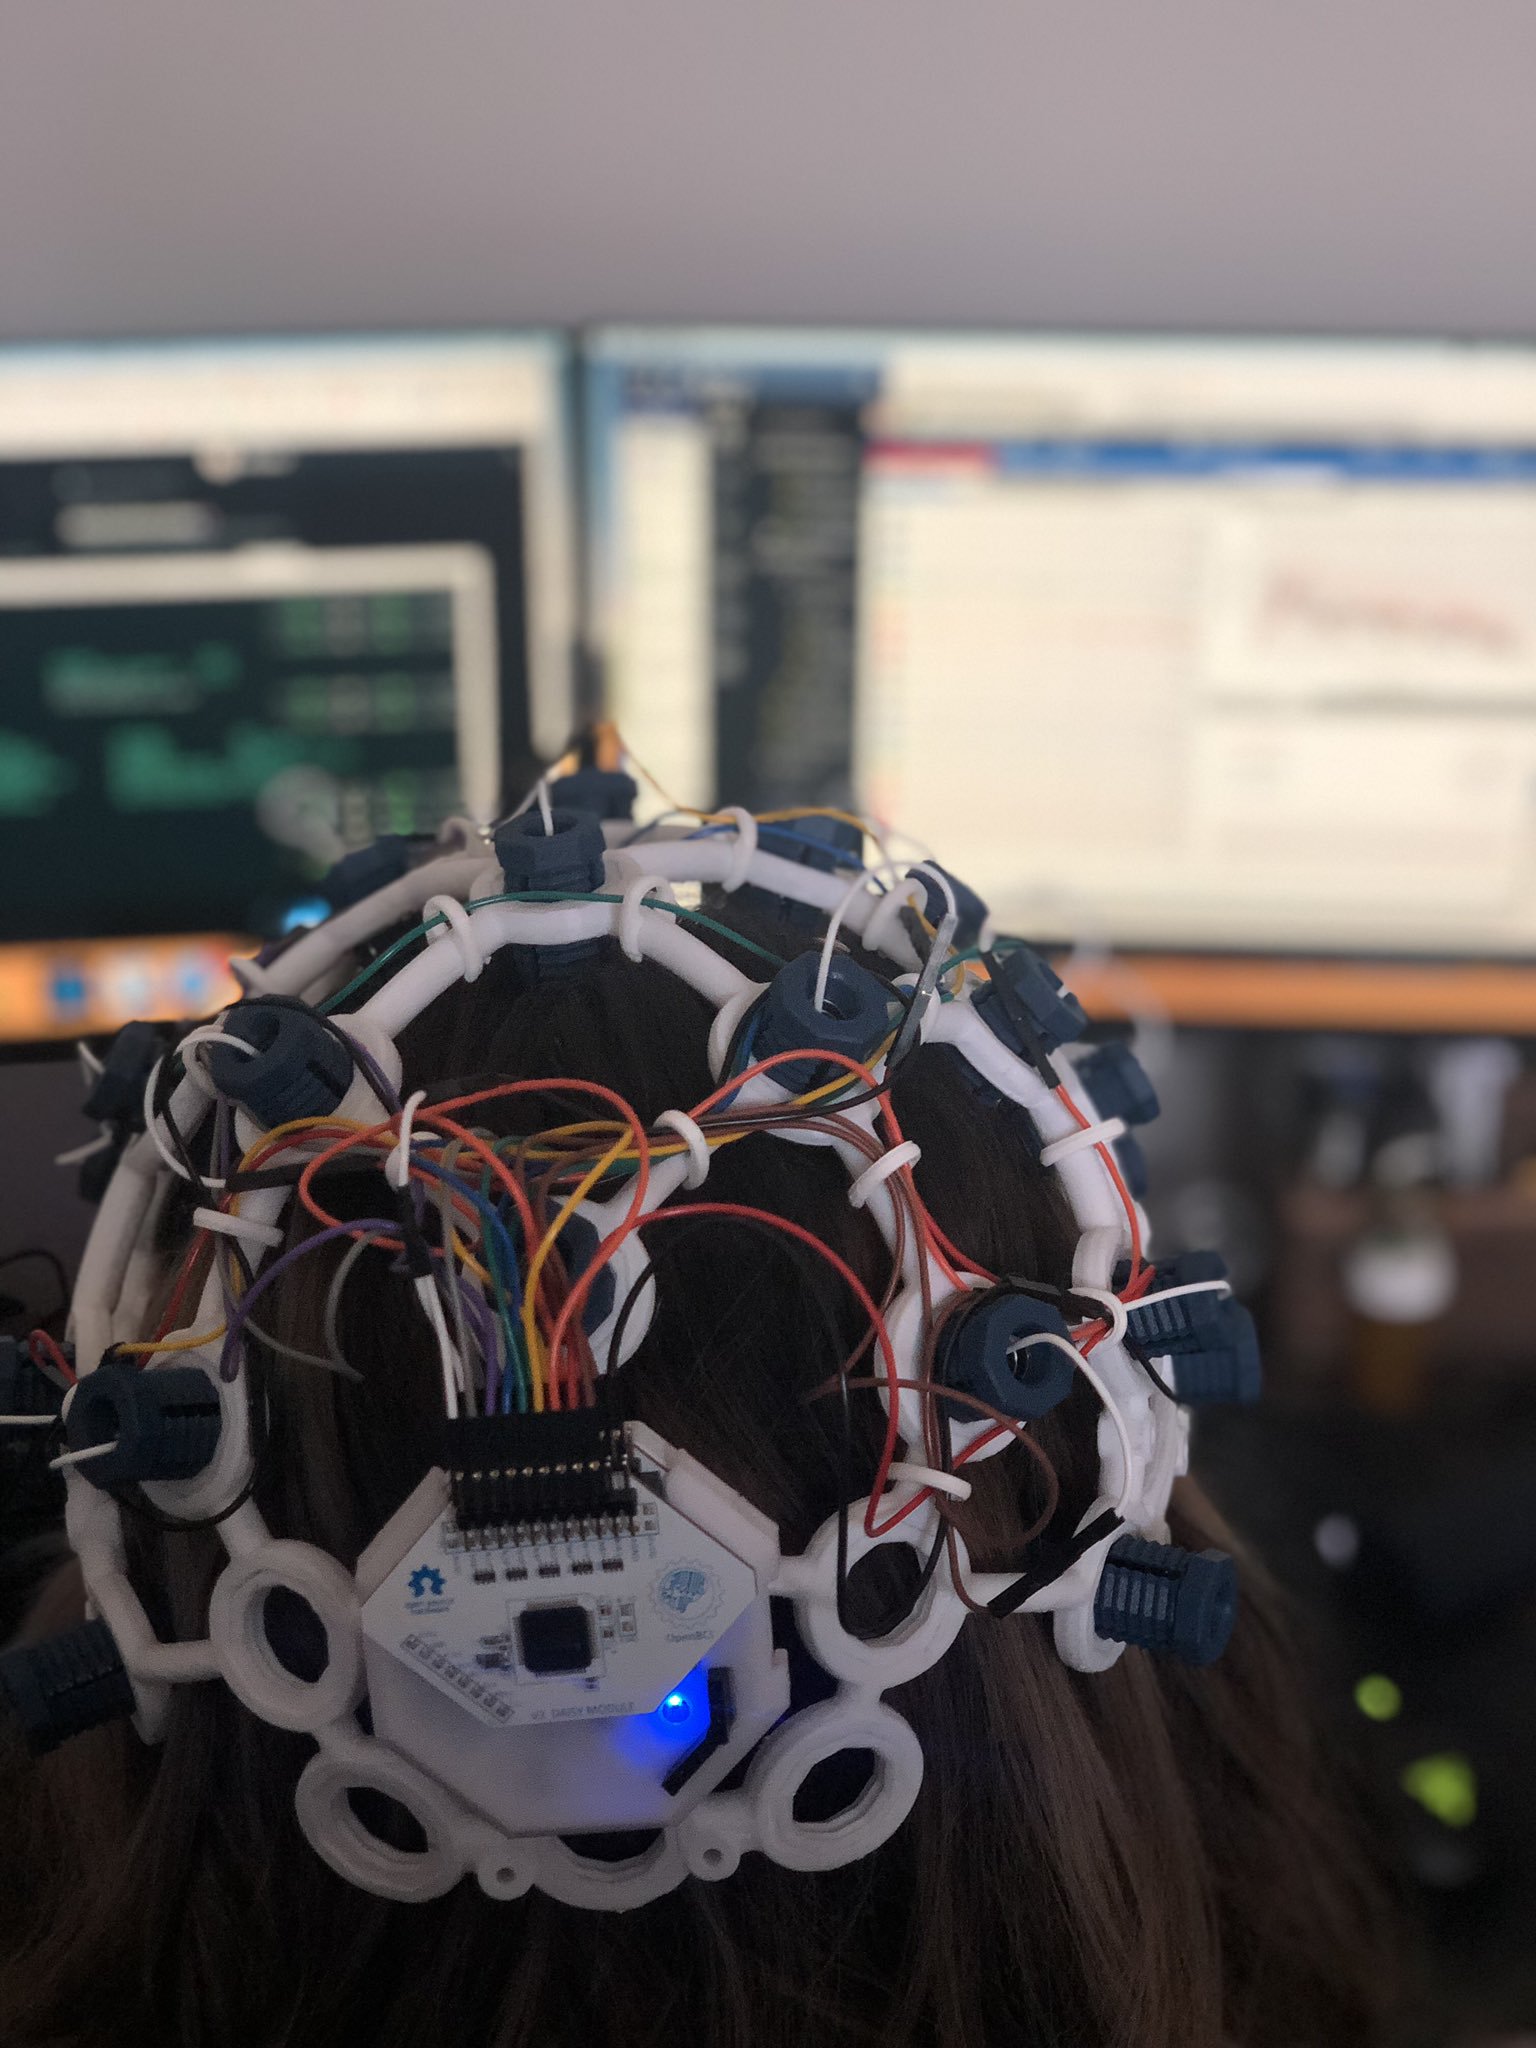
Fully assembled with all 16 electrode mounts and wiring attached
My first question after unboxing OpenBCI's Ultracortex was, ok, where do I put all of these wires? That actually turned out to be a harder question than I originally expected. The short answer is, it depends. Placement of the electrode mounts is highly dependent on what EEG sampling you want to observe. OK great, so in order to answer that we need to figure out what part of the brain we will need to observe. After a fair amount of asking industry friends and googling I learned that the part of the brain I should focus on for this to be most successful is the Motor Cortex.
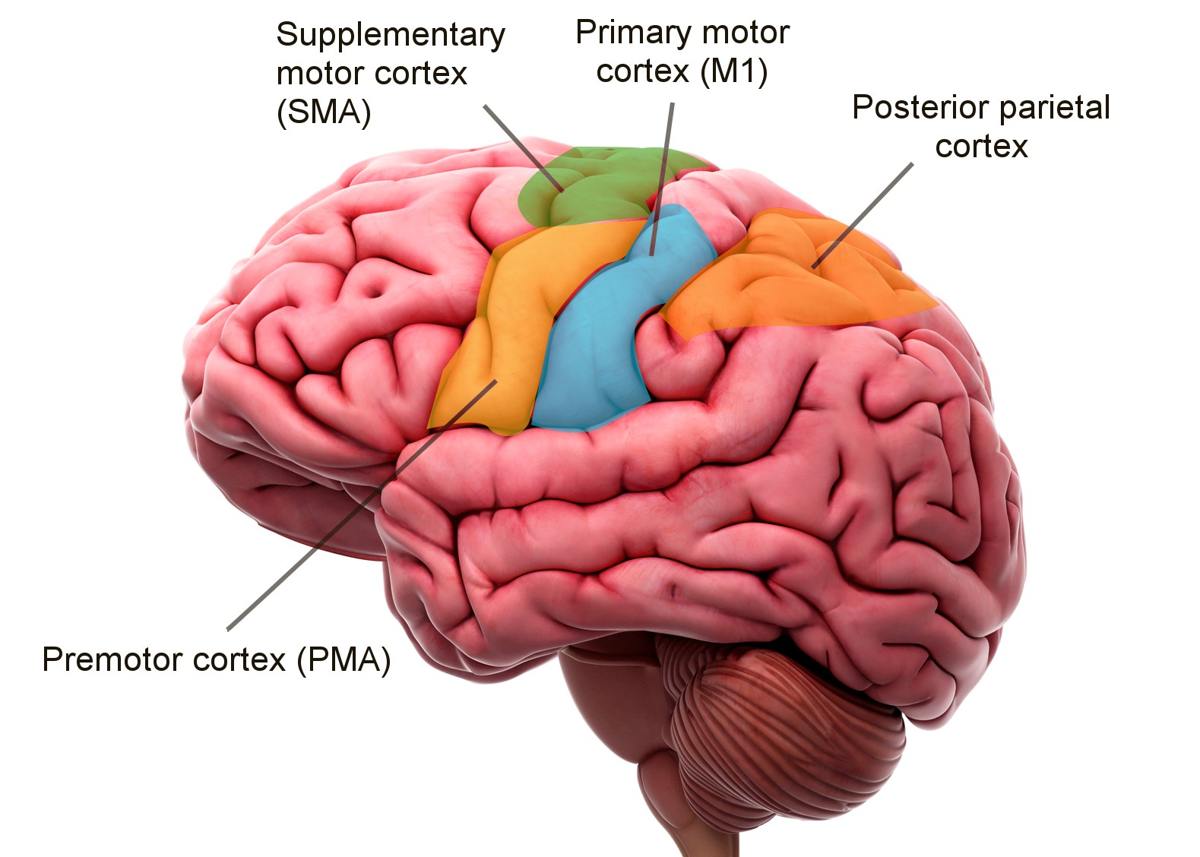
Your motor cortex sits in the middle of your brain and is responsible for all of your voluntary muscular activation. If you visualize wearing a pair of over the ear headphones, the band that rises up from those headphones over the top of your head and back down would be roughly where your motor cortex is located.
Ok, so why is the motor cortex the right part of the brain for us to focus on? To answer that, we need to learn a little bit more about how our brain works. Your motor cortex is responsible for controlling all muscular movement without your body from large scale movements such as running down to finer motor movements such as signing your name. When you perform any of these actions it is known as motor activation. Since you are quite literally, activating your muscles to perform a task. But it turns out, we also see activity in our motor cortex when we are purely thinking about a movement. This is a common occurrence in athletes who are mentally visualizing a set of movements they perform. In these cases where you are thinking about activating your muscles but are not directly activating them, your brain is still a beehive of activity. So much so that we can actively track when someone is thinking about moving but not actually moving.
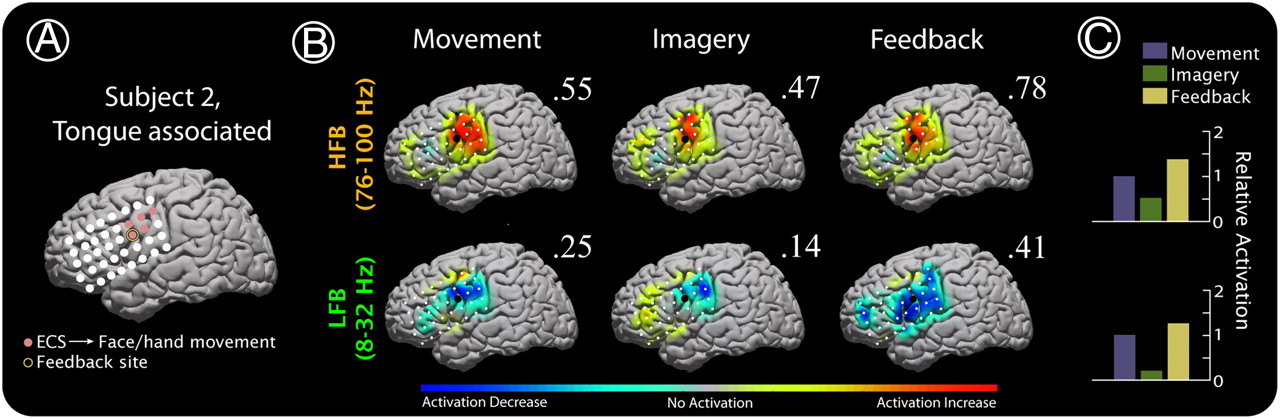
Image taken from:
Cortical activity during motor execution, motor imagery, and imagery-based online feedback
In the above image, we can see brain activity in the motor cortex for motor movement (motor activation) and when they are thinking about the movement which is known as Motor Imagery. It is important to note that motor imagery will always produce lower EEG signaling than Motor Activation. Which isn't surprising since Motor Activation will actually trigger the downstream muscular system to perform the action. With Motor Imagery we can build a flight system based around a subject's thoughts of moving their limbs.
A simple flight control system would be
- right: think about moving right arm
- left: think about moving left arm
- forward: think about moving both arms
- backward: think about moving both legs
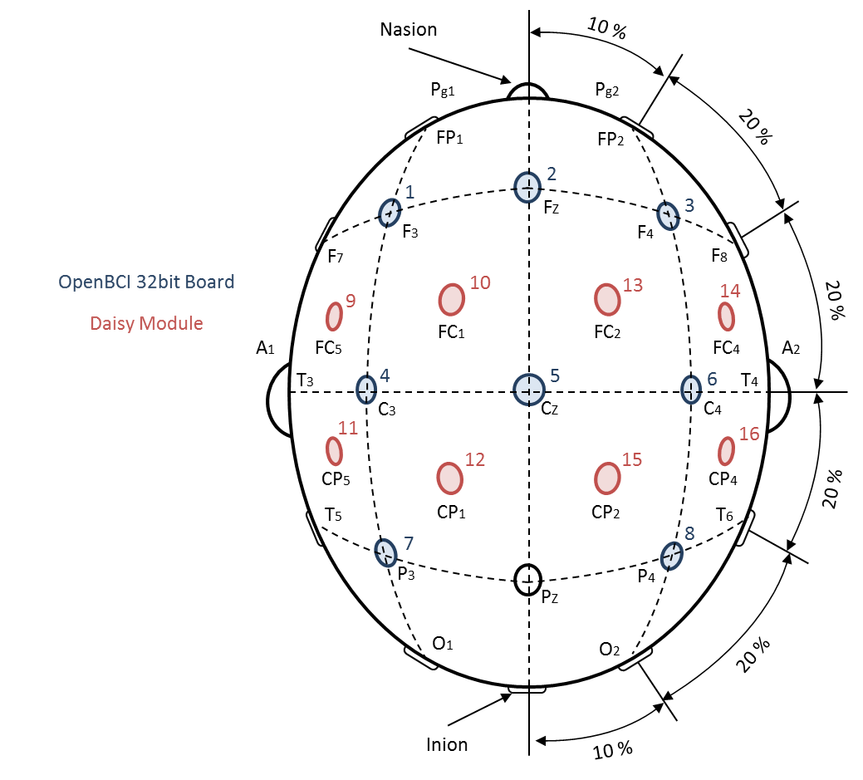
Being mindful of the fact that our motor cortex runs along a horizontal axis roughly above our ears, I placed electrodes in dense proximity along this axis. Taking extra care to not add electrodes to the back of the head which would pick up visual cortex stimulation and skew our results. Once setup, the code is rather trivial to record live EEG signals coming from our pilot's brain
cytonBoard.autoFindOpenBCIBoard().then(portName => {if (portName) {/*** Connect to the board with portName* Only works if one board is plugged in* i.e. cytonBoard.connect(portName).....*/cytonBoard.connect(portName) // Port name is a serial port name, see `.listPorts()`.then(() => {cytonBoard.streamStart();cytonBoard.on('sample', sample => {/** Work with sample */if (sample.valid) {let csv = directionIdx;sample.channelData.map(cd => {csv += ',' + cd.toFixed(8);});csv += '\n';fs.appendFile(`${__dirname}/data/training.csv`, csv, function(err) {if (err) throw err;});}});});} else {/** Unable to auto find OpenBCI board */console.log('Unable to auto find OpenBCI board');}});
OpenBCI has a fantastic Cyton SDK that retrieval of our live stream data a breeze. You can sample channel data, accelerometer data, timings and a host of other data points. Checkout their GitHub for a full list of libraries and sdk support.
n order to make model training more straight forward, I created a simple UI in the MindCraft project to track training progress as well as initiate a full model train. Upon clicking one of the Start buttons a training session begins. Which tells the backend server to start recording live EEG data from our soon-to-be pilot's brain while the pilot concentrates on the Motor Imagery task required.

This data is then recorded in a CSV file for offline processing. It is important to note that the first column indicates the direction the pilot was attempting to train for as well as all 16 EEG channels worth of measurements. For the purposes of this project, I did not include a timestamp since I didn't feel it would generate any useful gain in model performance.
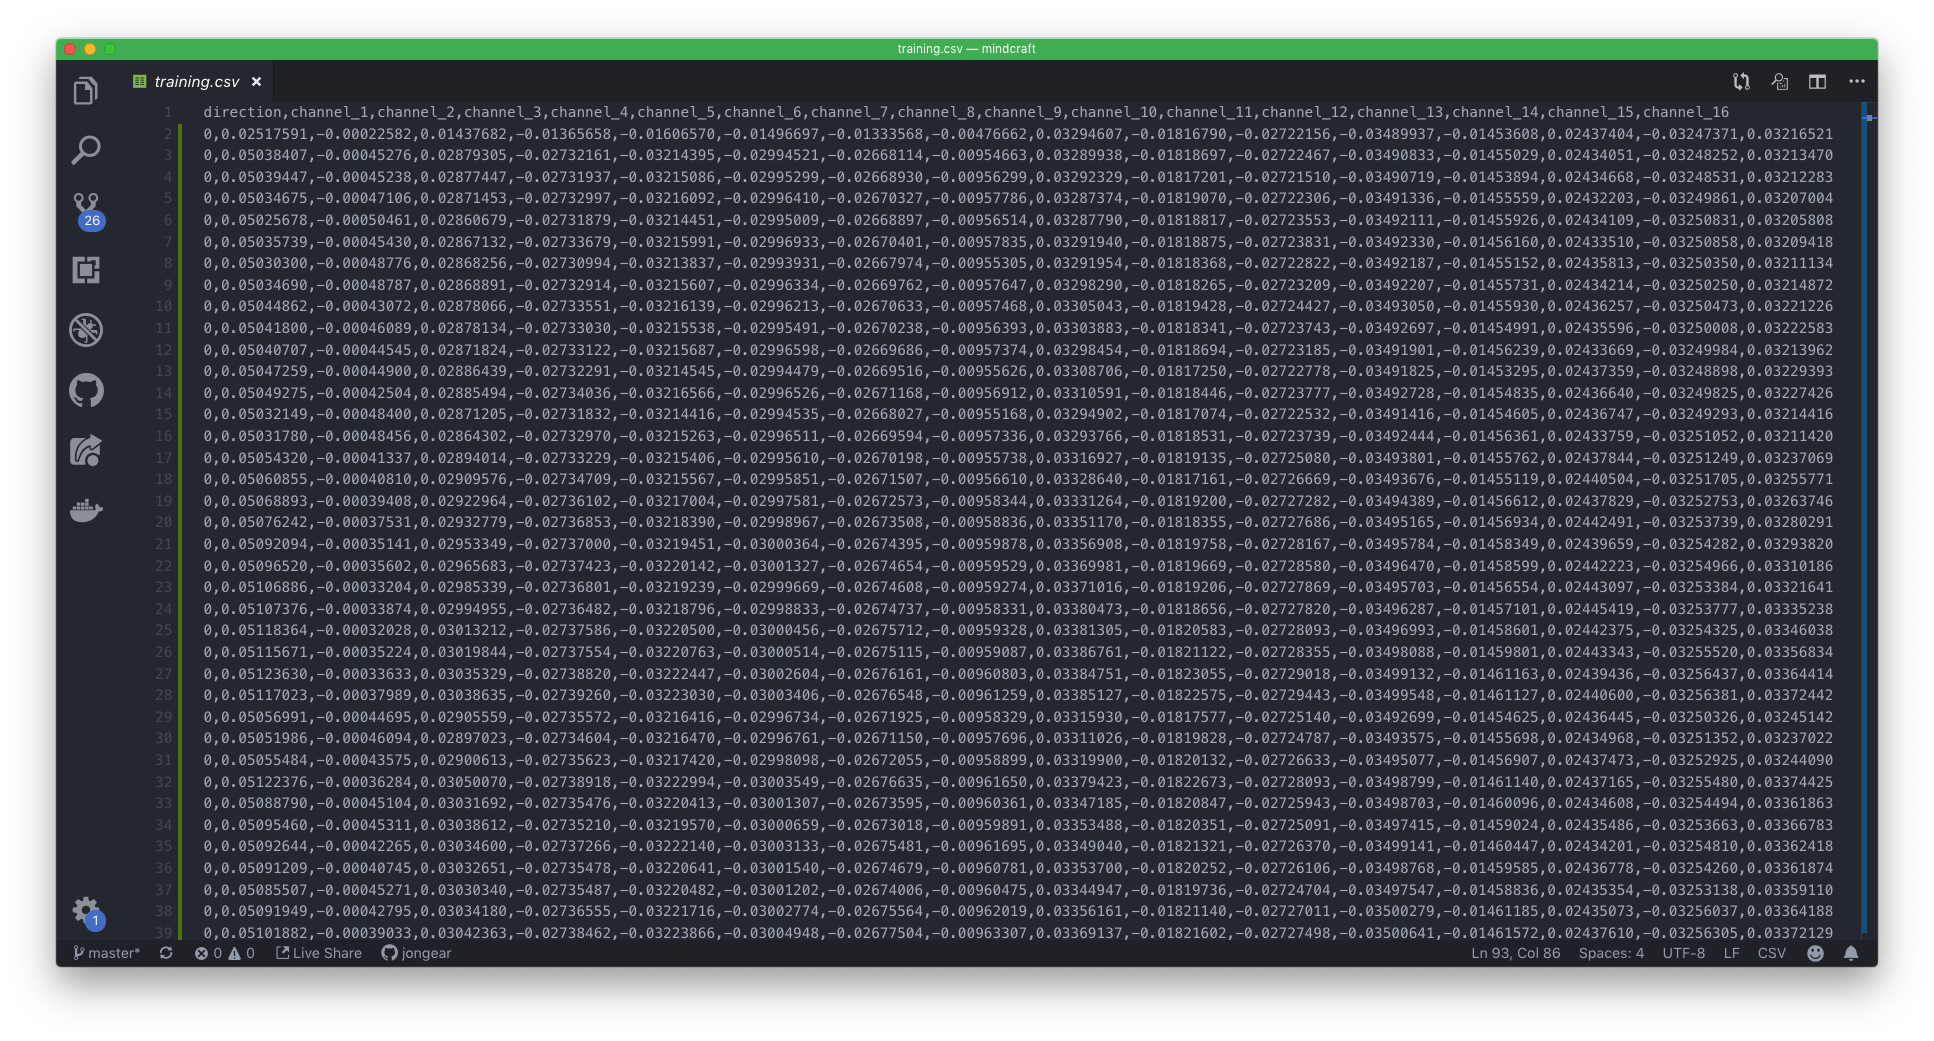
Sample training data. Note the first record in the column is denoted as the "direction". This is the direction the pilot was thinking of when the data was recorded
Since EEG data is inherently messy I opted for an offline training approach for teaching our system intent. I won't go deep into Machine Learning in this blog post but I do want to give you a high-level overview of what it takes to go from raw EEG input to decoding intent. I chose an approach known as Supervised Learning to teach our system to match EEG data to the intended direction. The gist is at the time of data record we also are saving what action the data is for. Our pilot starts a training session thinking about moving their right arm and we tag all EEG data we record during this window as being related to their right arm. Similar for the left, forward and backward directions.
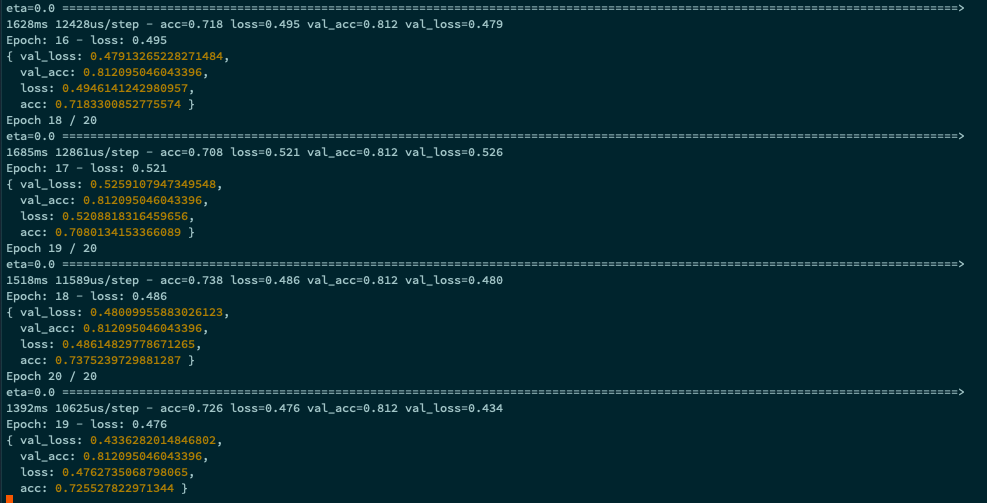
Tensorflow training iterations. Attempted to increase accuracy with each iteration by fine tuning hyperparameters
Once we accumulate enough of this data we run it through a machine learning algorithm to correlate intent to the data. For the purposes of this project I used TensorFlow which is a machine learning library developed by Google. And that's it! We are now able to control a drone simply by thinking about moving one of our limbs! Pretty cool right?
Thanks for reading. If you would like to learn more about Motor Imagery with OpenBCI I encourage you to checkout OpenBCI crossing swords with motor imagery